Those Earrings are also by Nela Kabelova.
You can find the free pattern at the Beadsmith's website HERE
Look under the MiniDuos.
Enjoy!!
Friday, July 29, 2016
Wednesday, July 27, 2016
Northern Star
This pattern is from the Beadsmith's website. It is a free pattern. you can get your free pattern here:
http://www.beadsmith.com/freeprojects.htmThis pattern is by Nela Kabelova.
Tuesday, July 26, 2016
Sunday, July 24, 2016
Passionate Pearls Bracelet
This bracelet is a pattern from the June 2016 Bead and Button Magazine.
It is designed by Margherita Fusco.
Margherita has a blog:http://75marghe75.blogspot.com/
She has many Youtube tutorials.
It is designed by Margherita Fusco.
Margherita has a blog:http://75marghe75.blogspot.com/
She has many Youtube tutorials.
Friday, July 22, 2016
Stardust Bracelet
This beautiful bracelet is a pattern by Evelina Palmontava, it was published in the Beadwork June/July 2016.
It uses Bi-Bo beads, I will try to make another bracelet using Rulla's instead of the Bi-Bo's.
Friday, June 24, 2016
Modern Patchwork Bracelet
You can see Marina's work and patterns at her store here: http://www.marinabeads.com./
Wednesday, June 22, 2016
Provence Necklace
It uses Superduos, seed beads and crystals.
You can purchase the tutorial HERE
Tuesday, June 14, 2016
Pearl Necklace with Button
I found this beautiful button at Hobby Lobby. I always wait for the their sale.
This was 50% off, so I paid $1.99.
I strung Freshwater Pearls that I bought at the last GemFaire in Costa Mesa for $2.00.
The clasp I also bought at the last GemFaire and It was 10 Clasp for $1.
So overall this was a very cheap necklace.
I cut the shank from the button and I filled it until it was smooth so it won't scratch the skin or snag on my clothes.
I took less than an hour to do the stringing part, the shank cutting and filling took about 45 min.
Saturday, June 11, 2016
Oh Earrings
This is the Oh Earrings to match my Oh Necklace and my Oh Bracelet from my previous 2 post.
The tutorial is from Kelly Dale from the Offthebeadedpathe on YouTube.
You can watch the tutorial HERE
The superduos for this project I got them from my local bead store JJ Beads in Huntington Beach, California.
The tutorial is from Kelly Dale from the Offthebeadedpathe on YouTube.
You can watch the tutorial HERE
The superduos for this project I got them from my local bead store JJ Beads in Huntington Beach, California.
Thursday, June 9, 2016
Oh Bracelet
This is the bracelet to match my previous post, the Oh Necklace.
This is a tutorial by Kelly Dale from the Offthebeadedpath on YouTube.
You can watch the tutorial HERE
This is a tutorial by Kelly Dale from the Offthebeadedpath on YouTube.
You can watch the tutorial HERE
Tuesday, June 7, 2016
Oh Necklace
This is my second Oh necklace that I have made.
I love this pattern so much!!
I was wearing my other set at a wedding and I gave it to my cousin, she also love it.
This a tutorial from Kelly Dale from the Offthebeadedpath on YouTube.
You can watch the tutorial HERE
I love this pattern so much!!
I was wearing my other set at a wedding and I gave it to my cousin, she also love it.
This a tutorial from Kelly Dale from the Offthebeadedpath on YouTube.
You can watch the tutorial HERE
Monday, June 6, 2016
Beaded Starfish Pendant II
This a YouTube tutorial by Kelly Dale from the Offthebeadedpath.
I blogged about this pendant last week, and as promised I made the lavender with gold seed beads.
You can watch the tutorial HERE
And this one is lavender seed beads in size 8 and silver seed beads in size 11.
I made both pendants this weekend.
I blogged about this pendant last week, and as promised I made the lavender with gold seed beads.
You can watch the tutorial HERE
And this one is lavender seed beads in size 8 and silver seed beads in size 11.
I made both pendants this weekend.
Sunday, June 5, 2016
Herringbone Pearl Rope Bracelet
This picture does not do justice to this bracelet.
This is a pattern by Yvonne King from MyAmary. This is a free pattern that can be found on Craftsy.com.
You can find the tutorial HERE.
The clasp I used was a button that I got from Hobby Lobby.
This is a pattern by Yvonne King from MyAmary. This is a free pattern that can be found on Craftsy.com.
You can find the tutorial HERE.
The clasp I used was a button that I got from Hobby Lobby.
Friday, June 3, 2016
Beaded Starfish Pendant
This is tutorial by Kelly Dale from the Off the Beaded Path on YouTube.
You can watch this tutorial Here
This a double sided starfish, you make two and sew them together.
It was very easy to make and you only need size 8 and size 11 seed beads.
Give it a try, I am making another one in lavender and silver beads.
The bail is square stitch, Kelly also shows us on how to make it.
Wednesday, May 25, 2016
Steering Wheel Bead Board
I made these bead boards using steering wheel covers.
They are about 15" round.
I saw a tutorial on Facebook last year. I can't find it anymore, otherwise I would give credit to whom thought about this smart idea.
I will show you how I did these bead boards:
Next I cut batting the same size as the pizza trays.
I placed them over the pizza trays, one on each side of the trays.
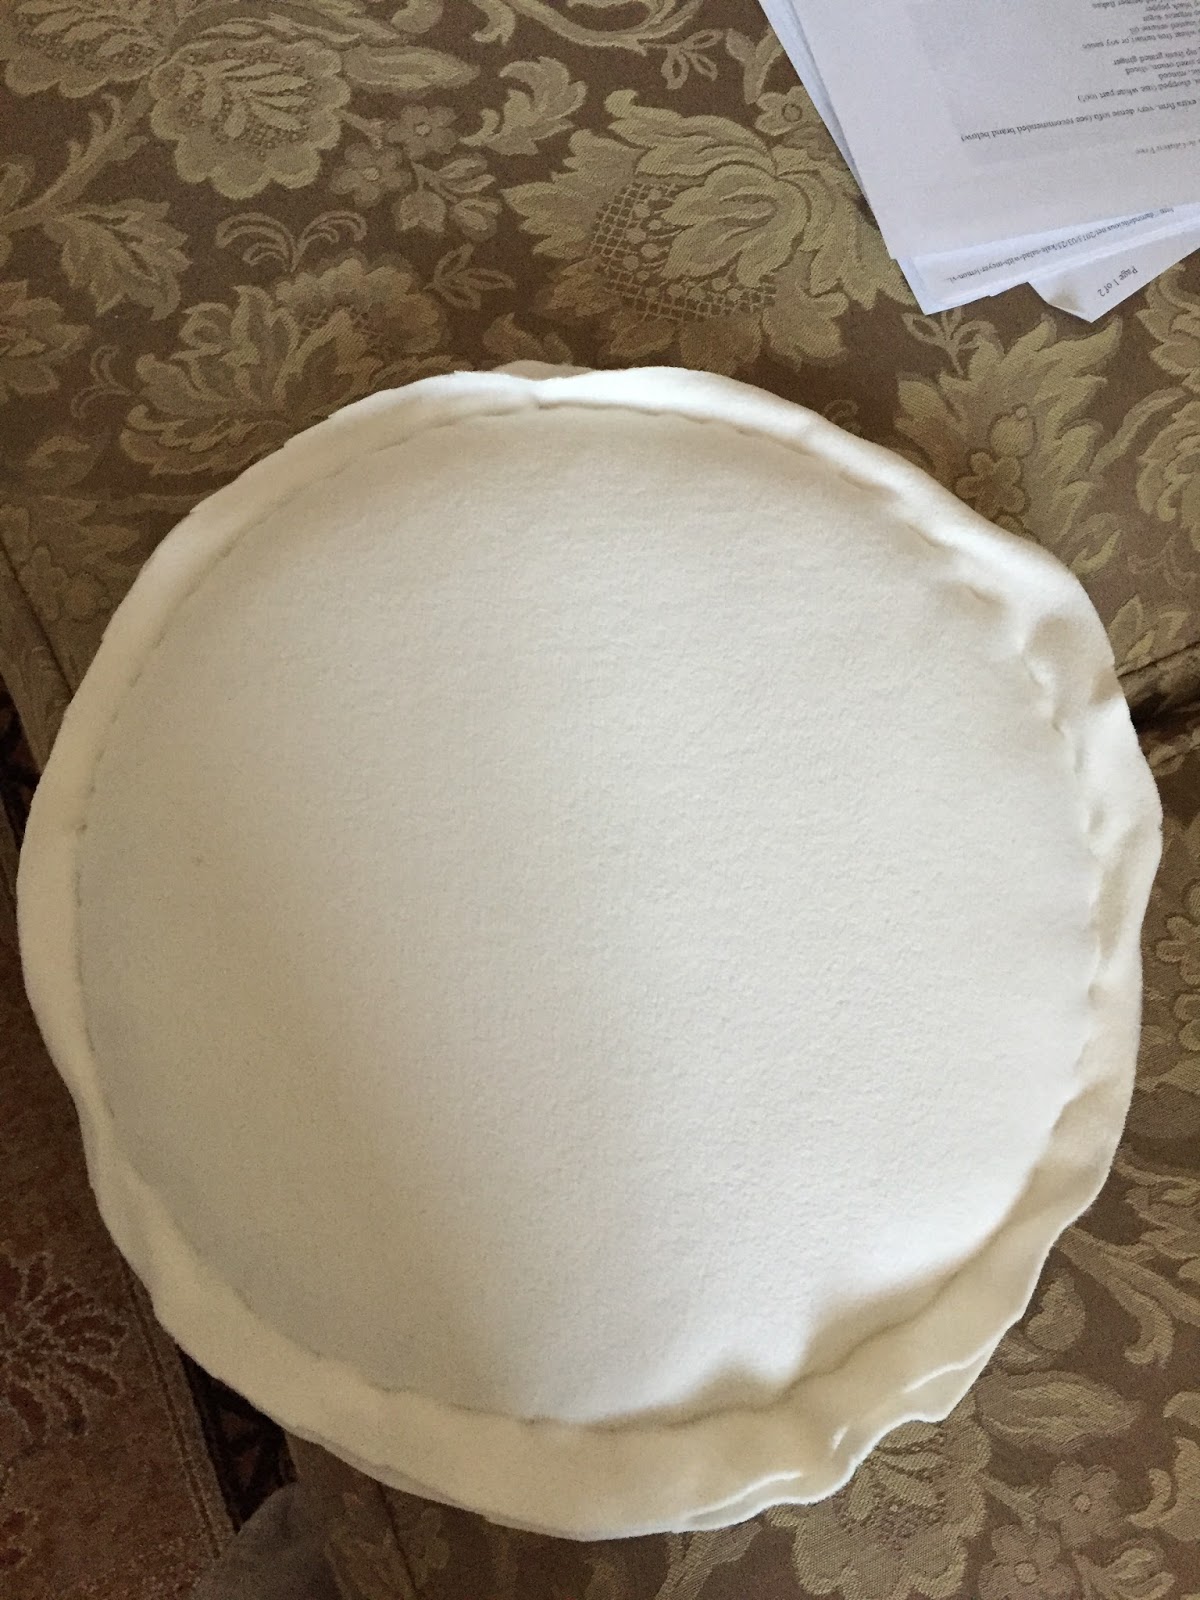
I bought a very soft fabric from Joann's, covered the pizza tray with the fabric and I used a running stitch on the outside of the trays, so I sandwiched the pizza trays, the batting and the fabric.
This is the steering wheel cover, I got this one at Walmart for about $7 next I inserted the whole thing inside the rim.
I did not trim the fabric, since it was a little loose in the rim. If it is to loose you can add bubble wrap inside the circle and then place your trays.
I used the light color fabric with the dark cover and the dark fabric with the light color cover.
I hope you like my color options.
If by chance you know whose tutorial this is, let me know and I will give credit to her.
If you buy these bead boards for this size you will be paying about $120.
These covers does not cost more $20 each.
It is a fun project!!!
Subscribe to:
Posts (Atom)